So, you're thinking about a concrete foundation project. Maybe it's for a new shed, an addition, or even a whole new house. It's a big deal, the very base of whatever you're building. You might be wondering, "Can I do some of this myself?" or "When do I absolutely need to call in the experts?" Let's break it down.
Before You Dig: Planning Your Foundation
Planning is probably the most critical part, and it's where you can save yourself a ton of headaches and money down the road. First off, what are you building? A small shed foundation is a world away from a multi-story home's foundation. The size and load requirements dictate everything from the thickness of the slab to the type of rebar you'll need.
You'll need permits. Don't even think about skipping this. Redmond's building department has specific codes for foundations, and they're there for a reason – safety and structural integrity. They'll want to see plans, and often, those plans need to be stamped by a structural engineer, especially for anything substantial. This isn't a DIY step; you'll need a professional for engineering drawings.
Site preparation is another big one. You've got to clear the area, remove any organic material, and get the ground level. For smaller projects, you might be able to handle some of the clearing and basic grading with a shovel and a good level. But for anything larger, or if your site has a significant slope, you're looking at needing heavy equipment and professional excavation. We've seen a lot of homes around Education Hill with tricky slopes, and trying to handle that kind of earthwork yourself without the right gear or experience is just asking for trouble.
Think about drainage too. Water is concrete's enemy. You need to make sure your foundation will shed water away from the structure, not collect it. This often involves grading, maybe some gravel, and sometimes even a perimeter drain system. This is another area where a professional can help design a system that works for our Pacific Northwest rain.
During the Pour: The Concrete Work
Alright, so you've got your plans, your permits, and your site is prepped. Now comes the concrete itself. This is where the DIY line gets pretty clear for most folks.
- Formwork: For a simple slab, you might be able to build the forms yourself. It's essentially creating a mold for the concrete out of wood or metal. It needs to be perfectly level, square, and strong enough to hold the weight of wet concrete. If you're doing footings, stem walls, or anything with more complex shapes, professional formwork is almost always the way to go.
- Rebar/Wire Mesh: Concrete is strong under compression but weak under tension. Rebar or wire mesh gives it that tensile strength. You'll need to cut, bend, and tie it according to your engineered plans. This is something you *can* do yourself for smaller projects, but getting it right – the spacing, the overlap, the chairs to keep it off the ground – is crucial.
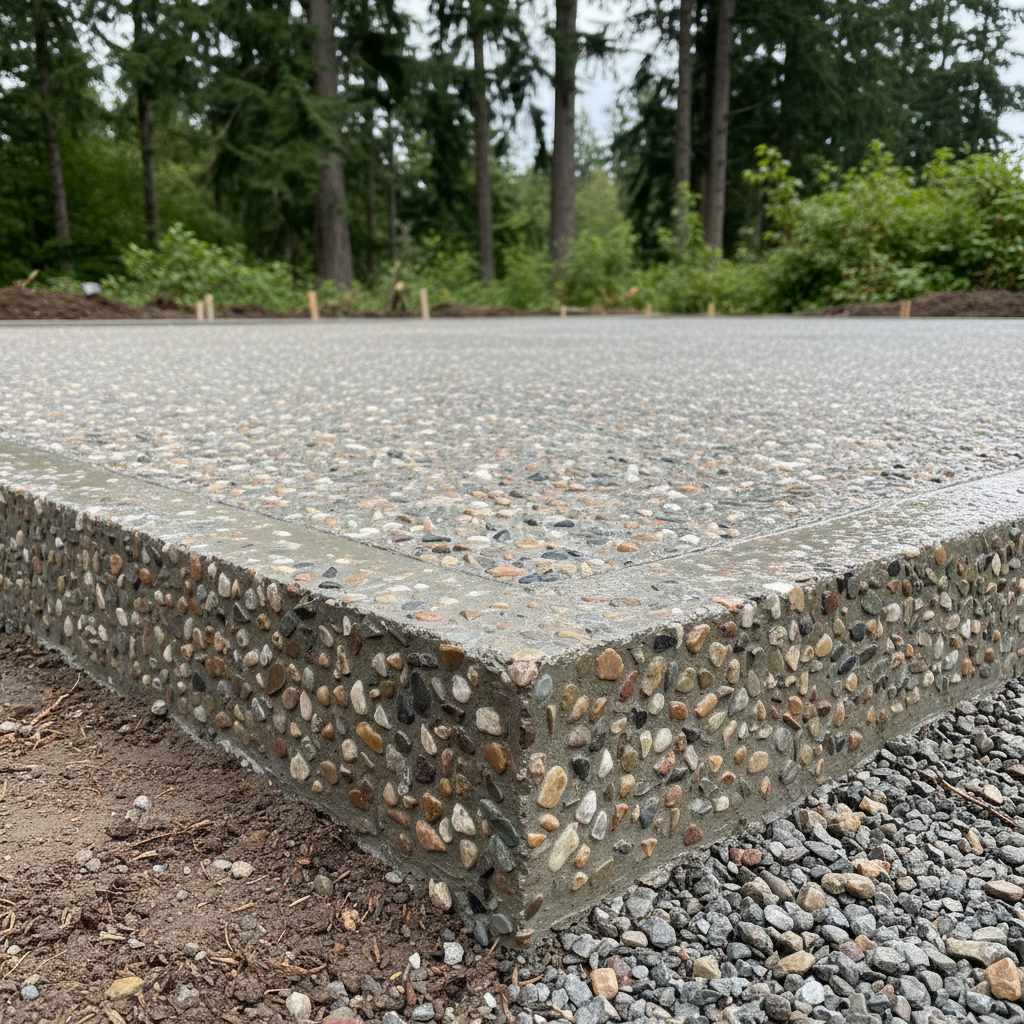
- The Pour: This is the big moment. Concrete cures fast, and once it starts, you can't stop. You need enough hands on deck to spread, screed, and finish the concrete quickly and efficiently. For anything more than a small patio, you'll need a concrete pump truck, and that's not something you operate yourself. Finishing the concrete – getting that smooth, level surface – takes skill and specialized tools like bull floats, darbies, and power trowels. A bad finish can lead to problems down the road, from poor drainage to an uneven floor.
Honestly, for anything structural, or even a decent-sized slab, hiring a professional concrete contractor like Allied Concrete Solutions is usually the smartest move. We've got the equipment, the crew, and the experience to get it done right, on time, and to code. Pouring concrete isn't just about getting it wet; it's about getting it right the first time.
After the Pour: Curing and Care
The work doesn't stop once the concrete is poured and finished. Curing is a vital step that many DIYers overlook or rush. Concrete needs to cure slowly to reach its maximum strength and durability. This means keeping it moist for several days, sometimes even weeks. You can do this by covering it with plastic sheeting, using wet burlap, or applying a curing compound. Don't let it dry out too quickly, especially in our dryer summer months, or you'll end up with a weaker slab and more cracks.
Once it's cured, keep an eye on it. Look for any signs of settling, excessive cracking (some hairline cracks are normal, but large ones aren't), or drainage issues. Address any problems early. For example, if you notice water pooling near your foundation after a good Redmond downpour, that's a sign you need to adjust your landscaping or drainage.
Ultimately, a foundation is literally the bedrock of your project. While you might be able to tackle some of the prep work for a very small, non-structural slab, for anything that will support a significant load or requires permits, you're almost always better off bringing in a professional. It's an investment in the long-term stability and safety of your home or structure. Don't cut corners here; your future self will thank you.